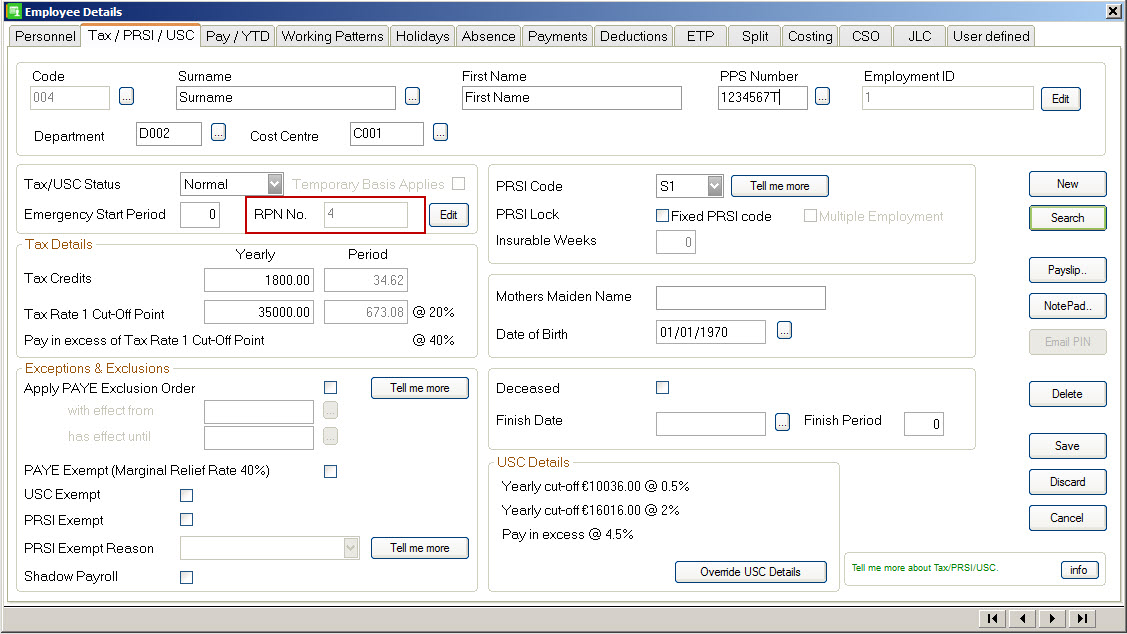
Revenue change the RPN number each time they issue the employee with a new RPN number so ti could be different for all employees. This information is coming from Revenue and you can contact them on 01-7383638 if you have any queries.
There are various reasons why you may need to enter employees’ year to date (YTD) values. For example, if you’ve purchased Sage Micropay part-way through the tax year and have already processed your employees’ wages either manually, using a different software package, or by outsourcing to a payroll bureau.
One approach is to process all of the previous pay periods during the tax year individually from the beginning of the tax year. If you have a large number of employees or periods to process, this may not be practical.
Generally, a better approach is to enter the YTD values for all of your employees. This process is also known as a mid year set up.
Preparation
Before you begin, you must set up the employee records in Sage Payroll, and gather the following employee YTD information:
Their total earnings with your company that are relevant to tax, PRSI and USC calculation.
The total tax, PRSI and USC paid while working for your company.
If relevant, the total non-taxable deductions received while working for your company. For example, employee and employer pension contributions.
The number of weeks worked to date with your company this tax year.
It’s important to print the Control Summary report before and after you enter employee YTD values. When you compare these two reports, the differences should only relate to the values you changed
Enter current employment YTD values
1. On the menu bar, click Processing then click Employee Details.
2. Next to the Surname box, click browse and click the relevant employee.
3. Click the Pay / YTD tab.
4. Ignore the following options, you enter these in the ETP tab at a later stage in the procedure:
Gross Pay This Employer.
Tax Paid This Employer.
Gross Income This Employer.
USC This Employer.
5. If the employee has any non-taxable deductions, such as pensions or PRSAs, complete the following fields. This shows the correct cumulative totals on the employee’s payslip:
If the employee has any non-taxable deductions, such as pensions or PRSAs, complete the following fields. This shows the correct cumulative totals on the employee’s payslip:
Employee Financial Year
Enter the total contributions made by the employee this financial year.
Employee Tax Year
Enter the total contributions made by the employee this tax year.
Employee From Start
Enter the total contributions made by the employee for the full term of employment with your company.
Employer Financial Year
Enter the total contributions made by your company on the employee’s behalf this financial year.
Employer Tax Year
Enter the total contributions made by your company on the employee’s behalf this tax year.
Employer From Start
Enter the total contributions made by your company on the employee’s behalf from for the full term of their employment with your company.
6. Under PRSI, enter the following information:
Employee Tax Yr
Ignore this option. Enter these values on the ETP tab at a later stage in the procedure.
Employer Tax Yr
Ignore this option. Enter these values on the ETP tab at a later stage in the procedure.
Employer Financial Yr
Enter the total amount PRSI paid by your company on behalf of the employee in the current financial year
7. Click the ETP tab, then select the I need to override these values check box.
8. Enter the following information:
Revenue require that all earnings relevant to a specific PRSI class are reported on separately in your P35 year end return. This means that if the employee has had more than one PRSI class, you must complete a new line for each one. For example, one line for PRSI class A1 and another line for PRSI class A0.
Period
Enter a period number. For example, 1.
Period Date
Enter a pay date. For example, 01/02/2017.
Gross
Enter the taxable gross pay earned to date in the current employment this tax year. This value should be the employee’s gross pay minus any:
Payments that are not subject to tax.
Employee pension contributions.
Other pre-tax deductions.
Tax
Enter the tax paid to date this tax year in the employee’s current employment.
PRSIable E’e
Enter the total gross pay to date that was subject to employee PRSI calculation in the current employment.
PRSI E’e
Enter the total amount of PRSI paid to date by the employee while in your employment this tax year.
PRSI Code E’e
Enter the relevant PRSI code. If you’re unsure about which PRSI code to select, please contact the Department of Social Protection.
PRSIable E’r
Enter the total gross pay to date that was subject to employer PRSI calculation in the current employment.
PRSI E’r
Enter the total amount of PRSI paid to date by your company on behalf of the employee this tax year.
PRSI Code E’r
Enter the relevant PRSI code. If you’re unsure about which PRSI code to select, please contact the Department of Social Protection.
PRSI Base
Enter the PRSI base code that the employee is classed under. If you’re unsure, please contact the Department of Social Protection.
Ins Wks
Enter the total number of insurable weeks to date that the employee has worked under this PRSI code.
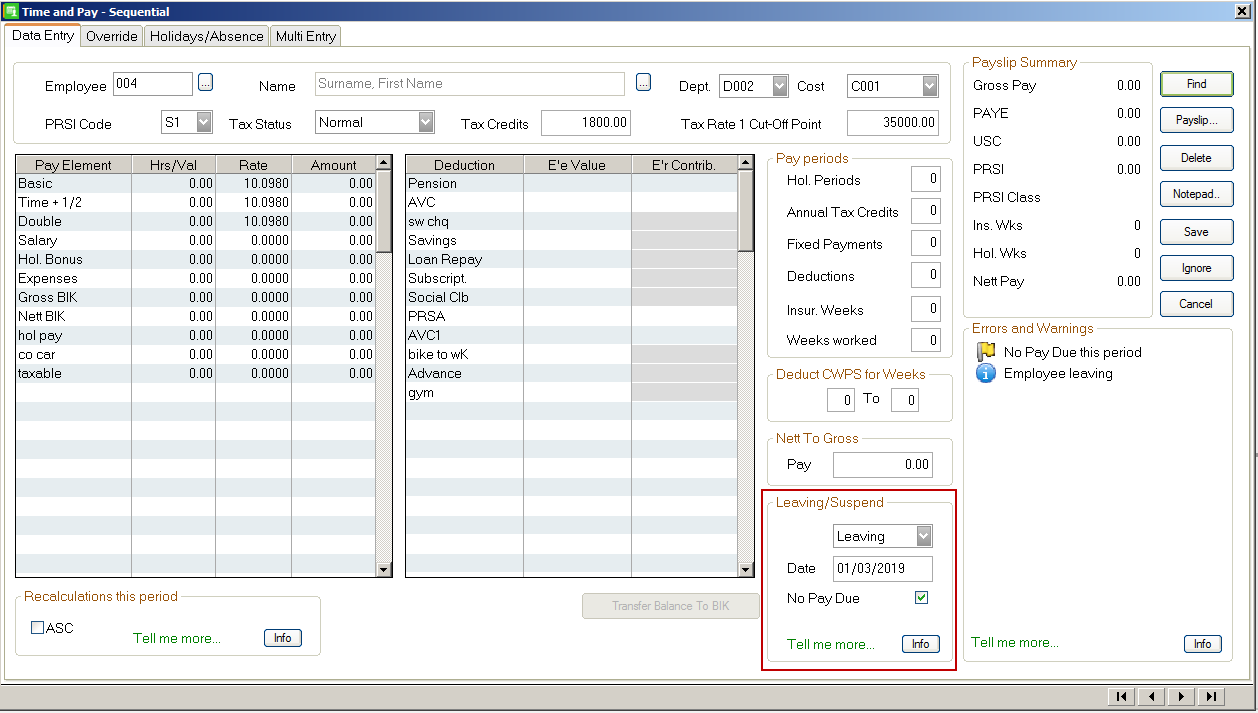
Left
If the employee has left your employment, click Y. If they haven’t left, ignore this option.
BIK Amount
If applicable, enter the total benefit in kind (BIK) income to date in the current employment this tax year.
BIK Tax
If applicable, enter the total tax paid to date on the BIK.
BIK PRSI E’e
If applicable, enter the total PRSI paid to date by the employee on the BIK.
BIK PRSI E’r
If applicable, enter the total PRSI paid to date by the employer on the BIK.
Gross Income
Enter the total income earned to date in the current employment that is subject to USC calculation this tax year.
USC
Enter the USC amount paid to date by the employee in the current employment this tax year.
BIK USC TP
Enter the BIK USC amount paid to date by the employee in the current employment this tax year.
Illness Benefit
If the employee has received any illness benefit payments while in your employment, enter the taxable amount.
9. Click Save.
10. If the employee pays local property tax (LPT) through the payroll, in the Property Tax TP box, enter the amount paid by the employee to date while in your employment.
11. Click Save.
12.Repeat steps 2 to 13 for each employee you want to enter current employment YTD values for, then click Cancel.
Enter YTD totals for each payment the employee uses
So that the correct cumulative totals appear on your employee’s payslip, you must enter the year to date totals for each payment the employee uses.
1. On the menu bar, click Processing then click Employee Details.
2. Next to the Surname box, click browse and click the relevant employee.
3. Click the Payments tab.
4. For each relevant payment, complete the following information:
Hours TD
If the employee is paid hourly, enter the total hours for this payment within the current financial year.
Value TD
Enter the total value to date of this payment for the current financial year.
Tax Yr Hours
If the employee is paid hourly, enter the total hours for this payment to date within the current tax year.
Tax Yr Value
Enter the total value to date of this payment for the current tax year.
5. Click Save.
6. Repeat steps 2 to 5 for each employee you want to enter payment YTD totals for, then click Cancel.
Enter YTD totals for each deduction the employee uses
So that the correct cumulative totals appear on your employee’s payslip, you must enter the year to date totals for each deduction the employee uses.
1. On the menu bar, click Processing then click Employee Details.
2. Next to the Surname box, click browse and click the relevant employee.
3. Click the Deductions tab.
4. For each relevant deduction, complete the following information:
Balance E’e
For pensions and PRSAs, enter the total amount the employee has contributed while in your employment this financial year.
For reducing balance deductions, such as, the bike to work scheme, enter the total amount of the deduction still to be repaid by the employee.
Total E’e
Enter the overall total amount the employee has contributed while in your employment.
Balance E’r
Enter the total amount to date your company has contributed this financial year.
Total E’r
Enter the overall total amount your company has contributed.
Tax Yr E’e
Enter the total amount the employee has contributed to date while in your employment this tax year.
Tax Yr E’r
Enter the total amount your company has contributed to date this tax year.
5. If the employee pays local property tax (LPT) through the payroll, under Local Property Tax, in the Total LPT box, enter the yearly value.
6. Click Save.
7. Repeat steps 2 to 6 for each employee you want to enter deduction YTD totals for, then click Cancel.
Check the Control Summary totals are correct
You should print the Control Summary report now and compare it against the same report you printed before you began the mid year set up procedure. If there are any discrepancies, you must rectify them before processing. Read more >>
Check your employee’s payslips are calculating correctly
The next time you process your employees’ pay details, check the tax, PRSI and USC calculations on each of your employees’ payslips are correct. They should be similar or identical to the calculations in your previous pay periods.
If there are calculation differences that can’t be explained, this usually indicates that there is a problem with some of the values you entered during the mid year set up procedure. To help you correct any issues, you must first identify what values are incorrect, for example, the employee is paying too much tax or they’re receiving an incorrect tax refund.
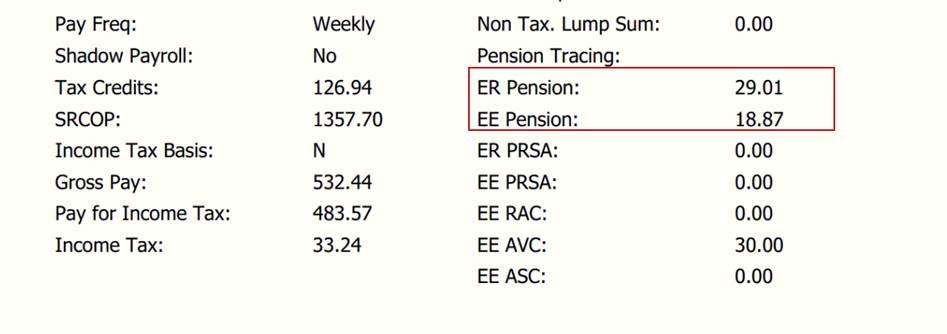
CWPS is now showing on the payroll submission under ER Pension and EE Pension. You need to be on the current version of the payroll software version number is 22.0.65.604.
This website uses cookies so that we can provide you with the best user experience possible. Cookie information is stored in your browser and performs functions such as recognising you when you return to our website and helping our team to understand which sections of the website you find most interesting and useful.
Strictly Necessary Cookies
Strictly Necessary Cookie should be enabled at all times so that we can save your preferences for cookie settings.
If you disable this cookie, we will not be able to save your preferences. This means that every time you visit this website you will need to enable or disable cookies again.
3rd Party Cookies
This website uses Google Analytics to collect anonymous information such as the number of visitors to the site, and the most popular pages.
Keeping this cookie enabled helps us to improve our website.
Please enable Strictly Necessary Cookies first so that we can save your preferences!
 and click the relevant employee.