How to Back up your Sage 50 Accounts
Sage 50 Data backup involves storing files from your Sage 50 Accounts package held on your PC or Server and put them in another location. Backing up your Sage 50 data regularly is extremely important and easy to do. If your Sage 50 data becomes corrupt or your computer stops working you can recover your data easily. This can save you hours of work from re-entering lost information. When running a backup please check your data first to ensure you have no corruption or errors on your data.
Pims recommended that you take a backup of your data daily and before you run any major processes in sage accounts such as your VAT Return, Clearing Audit Trail, Year End, Journal Reversals and If you are unsure of a process you should also backup your data this way you can restore if it doesn’t go the way you expected it to. The old traditional way of backing up was to floppy disks is now obsolete. Currently the most convenient way to backup is to a Memory Sick, External Hard Drive, Cloud (e.g. Dropbox) or CD/DVD.
It can be difficult to get everyone to log out of your Sage 50 accounts to do a backup. In the new Sage 50 2015 Accounts allows you to take backups while other users are still logged in. It will also allow you to schedule backups to run automatically so you don’t need to worry or get others to stop processing. Check data also runs automatically and you can manage backups and check the results for all companies in one place.
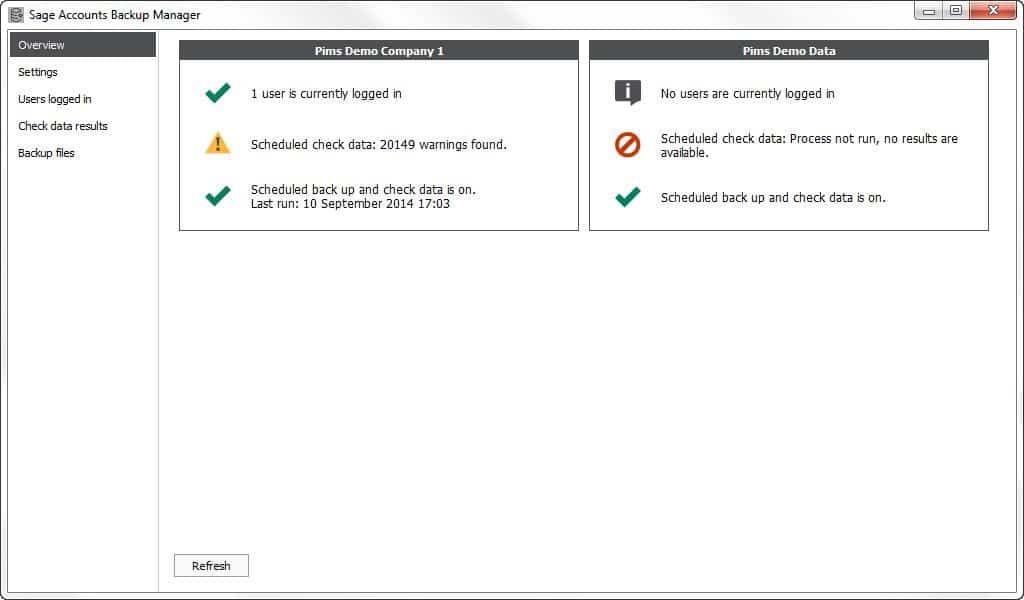
Overview
- For each company this section summaries the following information:
- Users – how many users are currently logged in to the company
- Check Data – Whether or not check data has been run. If check data has been run, ti shows if any errors, warning or comments were found.
- Scheduled Backup status –If the Scheduled backup and check data is currently switched on or off.

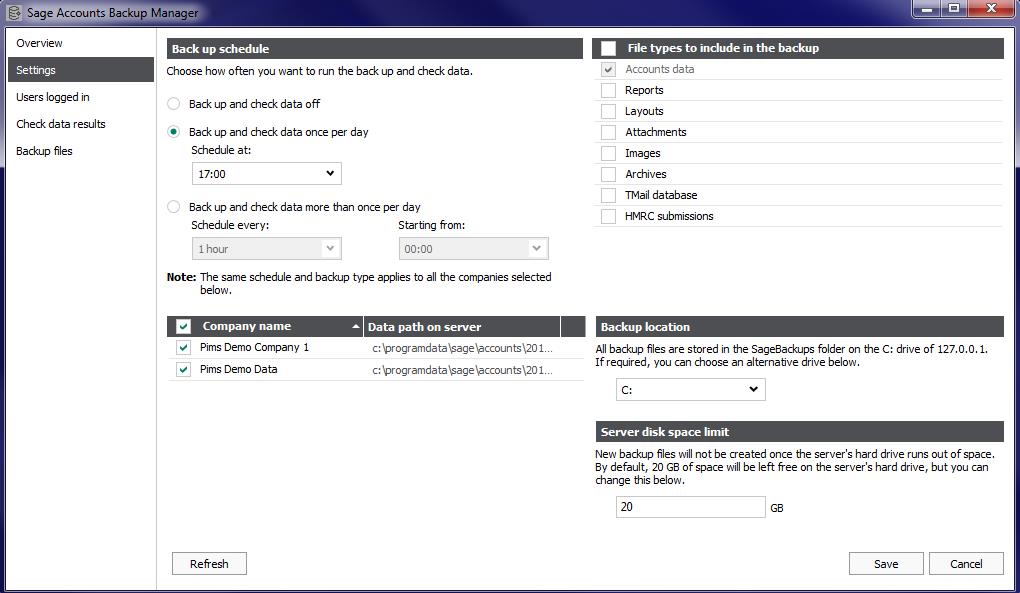
Settings
In this are you can set up how often you want to run a backup, what you want to include and where the backups are saved.
- Backup Schedule – Choose how often you want to run the backup and check data:
- Back up and check data off – No scheduled backups will run.
- Back up and check data once per day – Enter the time you want the backup to run each day.
- Backup and check data more than once per day – Enter the backup frequency and the starting time.
- Company Name – Select the companies you want the backup schedule to apply to. The same schedule applies to all selected companies.
- File types to include in the backup – Select the types of file you want to include in your backups. Accounts data is always included.
Note: Including all file types increases the size of your backup files.
- Backup Location – By default, backup files are saved to C:\SageBackups on your server computer. If your server has alternative drives, you can choose the drive you want to use.
- Server disk space limit – New backup files are no longer created once the server’s hard drive runs out of disk space. By default, 5 GB of space is left on the server’s hard drive. You can change this if required.

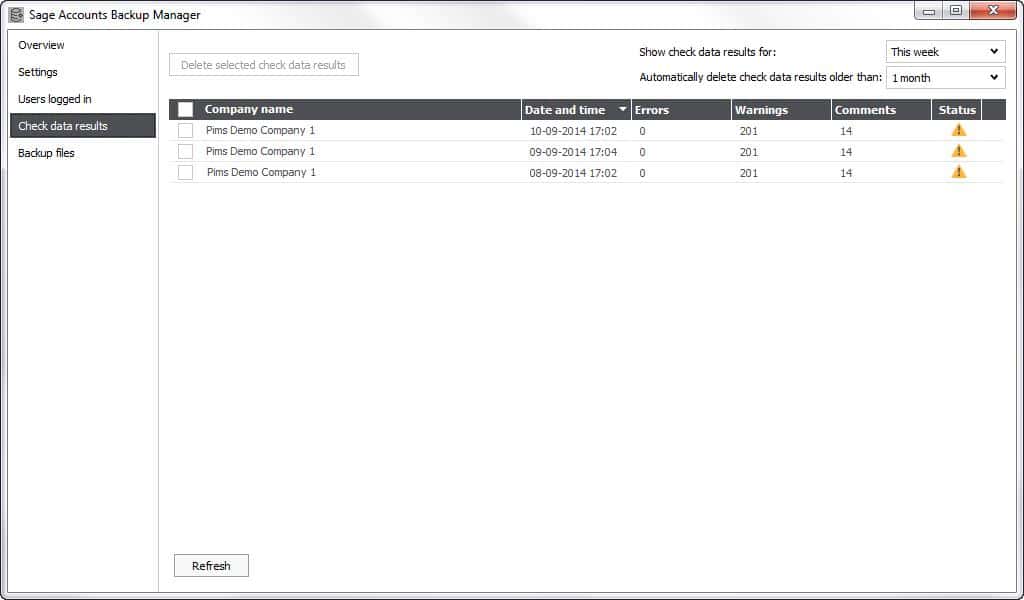
Check data results
Here you can see your check data history for all companies. For each check data it shows the following information:
- Company Name – The Company the check data was run for.
- Date and Time – The date and time the check was run.
- Error – The number of errors in the data.
- Warnings – The number of warnings in the data.
- Comments – The number of comments in the data.
Note: If any errors appear you should stop processing in the relevant company and fix the errors

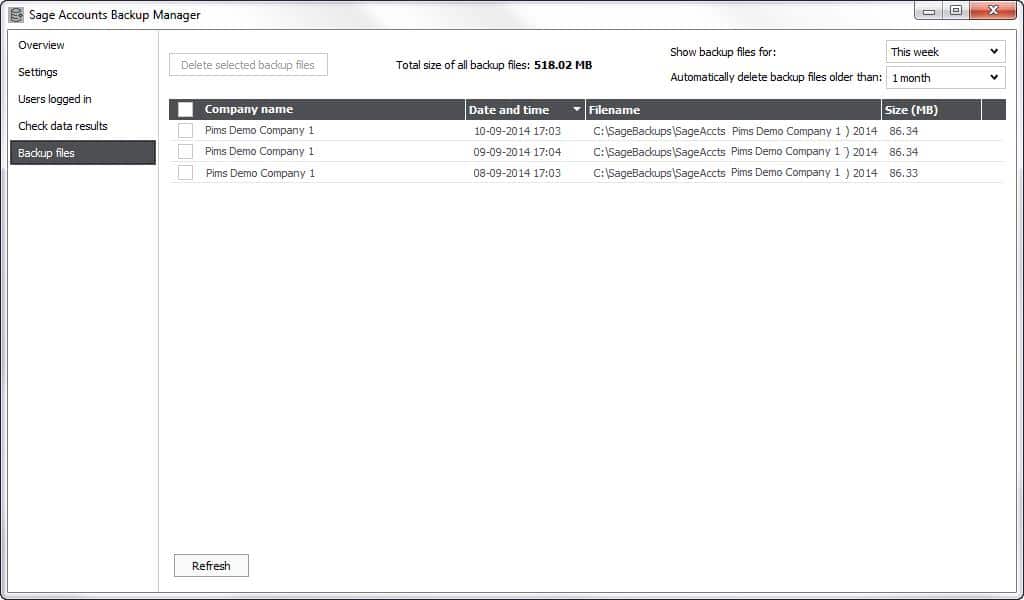
Backup Files
Here you can see a list of completed scheduled backups. For each backup it shows the following information:
- Company Name – The company that was backed up.
- Date and time – The date and time the backup was run.
- Filename – The name and location of the backup file.
- Size – The size of the backup file.
Tip: You can also see the total size of all backup files at the top of this window.


