• New Sage Payroll Update v27.1 Released
    Includes ERR and CWPS enhancements
  • New Sage Payroll Update v27.1 Released

KB Category: PAYE Modernisation/RTI (Real Time Returns)

Making corrections to the current period (in Sage Payroll 2019)

Making corrections to the current period (in Sage Payroll 2019)

We all know, mistakes can happen, and processing payroll is no exception. This article explains how to handle corrections in the current pay period.

If you need to make corrections to values in a previous pay period, please ignore the steps detailed in this article. Instead you should refer to article 6909 for guidance.


If you haven’t sent a payroll submission to Revenue for this period yet

The first thing you need to do is check the payroll status at the bottom of your window. If it reads:

  • End Of Period (EOP) – You’ll need to rewind the EOP process, then make the necessary changes to the relevant employee records and/or timesheets. Next you must post the EOP values again and then produce the Gross to Nett report. Check that all employees that should be paid this period are appearing on the report and that their values are correct. Once you’ve done this, you can send your payroll submission to Revenue.
  • Time and Pay Calculated or Start Of Period – Make the necessary changes to the relevant employee records and/or timesheets. Complete the rest of your payroll processing for this period as normal then post the EOP values. Once you’ve done this, you can send your payroll submission to Revenue.


If you’ve already sent a payroll submission to Revenue for this period

If you make any change to the current pay period after you’ve sent your initial payroll submission to Revenue, you must use the Re-Send Payroll Submission option to let Revenue know about these changes. The corrected payroll submission will replace the incorrect version that Revenue had previously received.


Using the Re-Send Payroll Submission option


1. Do one of the following:

  • From the menu bar at the top of the window, click Direct Payroll Reporting, point to Payroll Submission, then click then click Re-Send Payroll Submission.
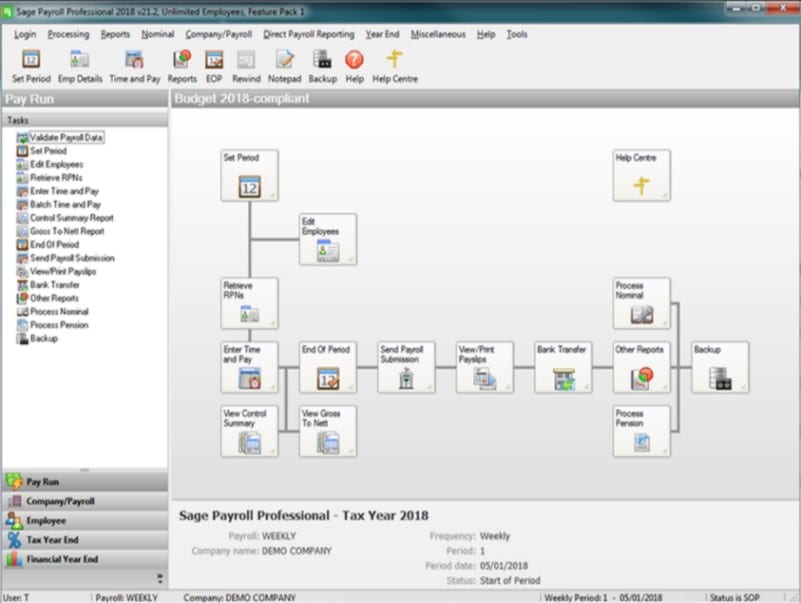
  • From the process map in the centre of Sage Payroll, click Send Payroll Submission then click Yes when prompted.

2. If your Revenue Online Service (ROS) login details already appear on-screen, skip to step 7.

3. Under ROS Digital Certificate, click Browse.

4. Browse to and select your ROS Certificate (.P12) file, then click Open.

5. Enter your ROS digital certificate password in the box provided.

6. If relevant, click the Save password to Sage Payroll check box.

7. Check the ROS login credentials are correct. Edit if required.

8. To proceed, click Next.

9. Check the information is correct within the Review Details window. To view a detailed breakdown of the values per employee, click Export Details.

10. Once you’re happy with the details, to proceed, click Submit.

Please note that once you click Submit, this process can’t be reversed or stopped.

11. Once the amendment submission is successfully received by Revenue, a confirmation window appears. To produce a copy of the submission log for your records, click Export Details then to:

  • Print the report, click the Printer button.
  • Save a PDF copy of the report, click the Save button.

To close the report, click X at the top right-hand side of the window.

12. To close the Send Payroll Submission window, click Finish.

If you want to check or review the previous submissions you’ve made to Revenue, you can do this using the View Payroll Submission Log option. Read more >


Making corrections to a previous pay period (in Sage Payroll 2019)


Making corrections to a previous pay period (in Sage Payroll 2019)


We all know, mistakes can happen, and processing payroll is no exception. For example, you may have recorded an overpayment to an employee in your software or entered the wrong finish date for a leaver.

This article explains how to handle corrections in Sage Payroll 2019 if you’ve already sent a payroll submission to Revenue for the relevant period the issue occurred in.

If you need to make corrections to values in the current pay period, please ignore the steps detailed in this article. Instead you should refer to article 6910 for guidance.


If an employee has been overpaid

You shouldn’t do any manual adjustments in Sage Payroll. Instead the correction to recoup this overpayment should be made in the next pay run. Here is a example of this:

John normally gets €500 gross pay per week. In week 1, John was out sick for one day. His employer doesn’t pay him for sick leave so John should only have been paid €400. However, the payroll operator wasn’t informed of this on time and so John was paid the full €500.

John’s employer must recoup the overpayment of €100 in the next pay run. John gets paid €500 weekly, so in week 2 John’s gross pay will be reduced to €400. This is the amount John was actually paid each week.

If an employee has been underpaid

You shouldn’t do any manual adjustments in Sage Payroll. Instead the correction of the underpayment should be made in the next pay run. Here is a example of this:

Mary normally gets €500 per week. In week 1, Mary worked overtime which meant that she should have been paid an additional €100. The payroll operator wasn’t informed of this on time and so Mary was only paid €500 instead of €600.

Mary’s employer has agreed to pay the €100 in the next pay run. Mary’s gross pay is €500 per week, so her gross pay is increased to €600 in week 2 to correct the underpayment. This is the amount that Mary was actually paid in each week.

Incorrect details on a submission

If you report incorrect values on a submission that can’t be rectified in the next pay run by either increasing or decreasing the employee’s gross pay, then you must make the necessary amendments to the relevant submission on the Revenue website to rectify the error. You should make any corrections required to the submission before the return due date to avoid penalties being applied.

Here are two examples of errors that require corrections be made to the original submission:

  • Patrick was paid €500 in week 1. However, the employer incorrectly reported his pay as €5000 in the payroll submission.
  • Jane left the company on 04/01/2019. However, the employer incorrectly reported her finish date as 04/10/2019 in the payroll submission.

Once you’ve made the necessary corrections to the submission in the Revenue website, you can then make the corresponding changes to your data in Sage Payroll. Please contact us on 051-395900 for further assistance with doing this.


PAYE Exclusion Order [V21.1 and Higher]

PAYE Exclusion Order


A PAYE Exclusion Order is a certificate issued by Revenue that authorises you to not deduct income tax and/or Universal Social Charge (USC) from an employee’s pay. If you receive a PAYE exclusion order, you should enter its details immediately on the relevant employee’s record.

You can get details of how to get an exclusion order from the link below:

https://www.revenue.ie/en/employing-people/what-constitutes-pay/paye-exclusion-order-issued-by-revenue/index.aspx

The exclusion order will come in on the RPN but if you need to manually enter you can do the following:

1. Open your payroll


2. Select the relevant employee


3. Tick the box to apply PAYE Exclusion Order


4. Enter in the from and to dates for the exclusion order

Director setting (required for PAYE Modernisation) (V21.1)

Director setting


If the employee is a director of the company, select the Director checkbox then specify the relevant ‘Type’.

The Director Type indicates whether or not the employee is a proprietary director.

A proprietary director is the company’s beneficial owner (or director) who can control directly or indirectly more than 15% of the company’s ordinary share capital.


1. Select Edit Employees from Processing employees or click on Edit Employees on the process map.


2. Click on code … and browse for the relevant employee


3. In the first tab Personnel select if the employee is a director and the type of director


4. Click Save


Sage RTX Service – White list URLs – Customer guide

Sage RTX Service – Customer guide

The Sage Payroll system consists of many parts, but we will talk about them at a high-level here:

  • The Sage Payroll desktop software you interact with on a daily basis.
  • Web services (online processing of data to be submitted to revenue).

Sage has developed a web service platform that facilitates integration with government gateways including the Revenue ROS service for PAYE Modernisation. This service is provisioned with AWS.


Security


The service has been developed using secure development and test procedures and guidelines. AWS Shield is used to mitigate against attack as well as providing a level of web application firewall capability. All interfaces are secured authentication and use encrypted channels.


Protecting data/regulatory compliance


The RTX Service is fully compliant with UK Data Protection Act 1998 and supports the EU General Data Protection Regulation (GDPR).


URLs to be Whitelisted


The following URLs are used by Sage in the process of connecting to the Revenue service for PAYE Modernisation.


Item URL Description
Sage RTX Service* https://api-rtx-ie-prod-ros.sagertx.com The URL of the Sage Real Time Exchange (RTX) Service. This is where the product sends the data that we need to be able to process anything.
Amazon Web Service S3 buckets* https://rtx-ie-prod-ros-s3-eu-west-1-files.s3.eu-west-1.amazonaws.com Amazon Web Service is the cloud infrastructure that Sage use to host, process and store the information for the Sage Real Time Exchange (RTX) Service.
Sage Token Service* https://www.sagetokenservice.com Sage Token Service is used to authenticate your interactions with Sage Services.

* Please note that none of the above will work when viewed via a web browser. The above URLs need to be accessed via defined protocols and secured requests.


Data transit and storage


For full details of Sage Governance, please visit https://trust.sage.com/governance


Data in transit


Data in transit from desktop to Revenue is transmitted via encrypted channels and secured with authentication.


AWS


Data pertaining to submissions is stored in an S3 bucket in AWS.  This bucket has server-side encryption configured. When you use server-side encryption, Amazon S3 encrypts an object before saving it to disk in its data centres and decrypts it when you download the objects. The exact fields stored in this data differs per client but its will be a superset of the data required to generate the necessary submissions.


Mongo DB


Data pertaining to registration and the configuration of the service is stored in a MongoDB cluster. Collections are:

  • Organisation.
  • Company.
  • Subscription.
  • Tracking.
  • RequestMetadata.

There is no sensitive data stored in any of these collections. Nevertheless, all data is encrypted at rest and access is limited to appropriate personnel.


AWS Parameter store


Data pertaining to the configuration of the service is stored in AWS Parameter Store.  Typical values are database connection strings and passwords.  AWS Systems Manager Parameter Store provides secure, hierarchical storage for configuration data management and secrets management.  All values are saved as secure strings and access is limited to appropriate personnel.

What data is stored


Only data which is critical to the function of the RTX Service is stored, and a thorough assessment of this data has been conducted prior to the design and implementation of the system.
For the purpose of the RTX Service, the Data Processor is Sage UK Ltd.


Pimbrook Employee Guide – How to set up and register a Job on Revenue ‘My Account’

Click here to download a word copy of this guide

Click here to download full copies of the employee forms

Pimbrook Employee Guide – How to set up and register a Job on Revenue ‘My Account’


1. Get the Employee to Fill in the Employee New Starter form.


2. Give the Employee the Employee form for Revenue filled in.


Click here to download full copies of the employee forms


3. How to Register with a ‘MyAccount


If you have a verified MyGovID account, you can use your MyGovID details to sign in or to register you will need the following:

  • PPS number
  • Date of Birth
  • Mobile number or Landline number
  • Email address
  • Home address


a. Click on the link for my account

https://www.ros.ie/myaccount-web/sign_in.html?execution=e1s1


b. Click on Register now

c. To get instant access, verify your identity with 2 of the following:

  • Irish driving licence number
  • Information on your P60
  • Information from your income Tax notice of assessment or acknowledgement or self-assessment.

When you have all the relevant information click on Start Registration


d. Enter in your PPS number

e. Enter how you wish to get your temporary password: By text, by email or by post and click Next (By Post will take up to 5 days). Click Next


f. Enter in your First name and Family name and Click Next

(please note the name you enter here must match your PPS number and your payroll e.g if you have your maiden name registered to your PPS number this is the name you use)


g. Enter your date of birth Click Next


h. Enter in your address and Click Next

i. Enter in your Phone number and Click Next


j. Enter in your email address and Click Next


k. Select what form of identity you are going to provide


l. If you select driving licence enter your licence number and click Next

m. If you select the Income Tax notice of assessment or acknowledgement of self-assessment enter the details of Year, Notice Number and Date of Issue and Click Next.


If you don’t have the 2 forms of identity you can click back and select the register by post (this takes up to 5 days).


4. Add the Job to ‘My Account’


a. Sign into ‘My Account’

https://www.ros.ie/myaccount-web/sign_in.html?execution=e1s1


b. Enter your Sign In details (PPS Number, Date of Birth and Password)

c. Select Add Job or Pension

d. Click Start to Add the Job

e. Click on Add Job and follow the 4 steps in the wizard through to the end.


f. Section two

Tell us how long you have been living in the Republic of Ireland


g. Section three

Tell us about your overall income


h. Section four

Review your details and Submit


You have now successfully added an employment to ‘My Account’