Medical Insurance eligible for tax relief
In Ireland a person is entitled to tax relief on any medical insurance premiums paid in a tax year.
Relief available is equal to the lesser of either:
- 20% of the cost of the policy
- 20% of €1,000 (equal to a credit of €200)
Premiums are usually paid in either one of 2 ways as below:
- You pay your own premium privately to Laya or VHI etc – in this scenario, tax relief @ 20% is given at source by way of a discount on the premium from the health insurer. There is no need to claim tax credits or claim relief at the end of the year.
- The employer pays the health insurance premium on behalf of the employee – in this instance, the employer must process a benefit in kind in the payroll to tax this benefit in the hands of the employee. The employer is charged the full value of the premium and does not get tax relief on the premium cost. The employee can then claim tax relief @ 20% up to a maximum value of €200 by going on to their revenue “myaccount” at the end of the year.
In Sage Payroll, the information regarding medical insurance paid by the employer for the employee is recorded by setting up a benefit in kind for this notional pay. At the end of the year the employer must submit the “Medical Insurance Eligible for Tax Relief” for each employee that they pay a premium for. To do this in Sage Payroll :
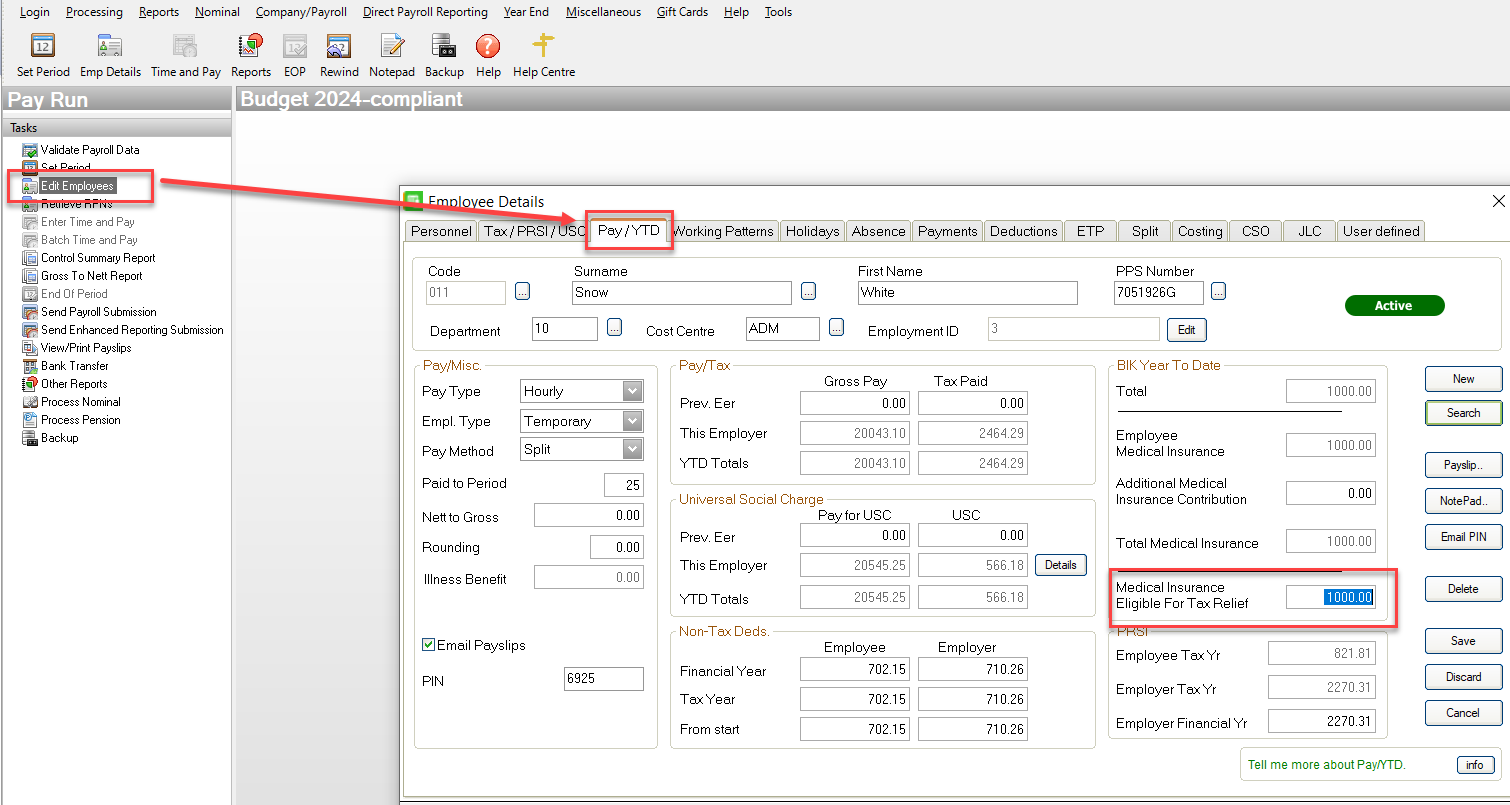
- Go to Edit Employees
- Select Pay/YTD tab
- Manually enter the figure for Medical Insurance Eligible for Tax Relief in box as shown. This figure should be available from the medical insurance provider.
- Employers should insure that this information is included for the last submission of the tax year.
Manually enter medical insurance eligible for tax relief values
- From the menu bar at the top of your window, click Processing then click Employee Details.
- From the process map in the center of Sage Payroll, click Edit Employees.
2. Next to the Surname box, click browse  and click the relevant employee.
3. Click the Pay / YTD tab.
4. Under BIK Year To Date, in the Medical Insurance Eligible for Tax Relief box, enter the amount.
5. Click Save.
6. Repeat steps 2 to 5 for all relevant employees, then click Cancel.
Import medical insurance eligible for tax relief values into Sage Payroll
1. Click on the following link: BIKMEDTRS.zip >>Depending on your Internet browser, the file automatically download to your Downloads folder or you’re prompted to save the file.
2. If prompted, browse to where you want to save it, for example, the Windows desktop, then click Save.
3. Locate and right-click the downloaded file, then click Extract all.The Extract Compressed (Zipped) Folders window appears.
4. In the Files will be extracted to this folder box, type C:\

5. Select the Show extracted files when complete check box, then click Extract.
Once successfully extracted, the folder BIKMEDTRS opens automatically in Windows Explorer.
6. Open Sage Payroll and log in to the payroll as normal.
7. On the menu bar, click Reports then click Report Writer.
8. Click File, then click Open.
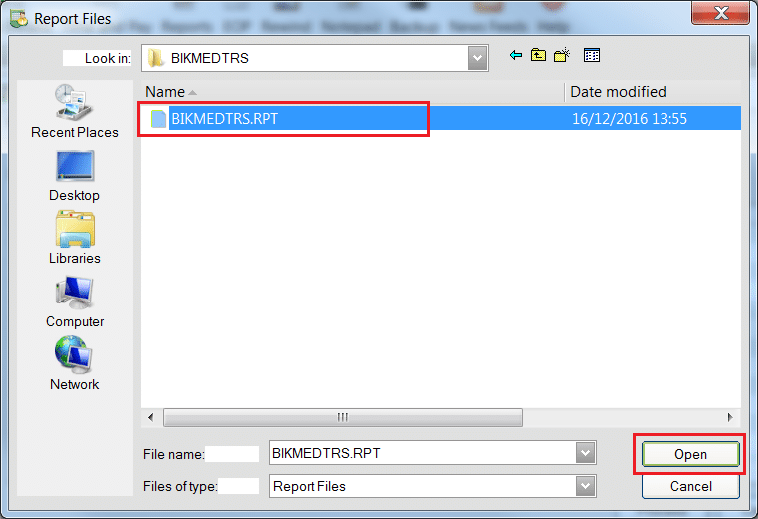
9. Browse to C:\BIKMEDTRS.
10. Select BIKMEDTRS.RPT then click Open.
11. Click Process.
A report listing all employees in your payroll appears on-screen.
12. Click File, then click Save As.
13. Click the Save in arrow, then browse to C:\BIKMEDTRS.
14. In the File name box, type bikmedtrs.csv.

15. Click Save.
16. Close Sage Payroll, then browse to C:\BIKMEDTRS.
17. Right-click the file BIKMEDTRS.CSV, then left-click Open with.
18. When prompted, select Excel then click OK.
19. Under column D, enter the medical insurance eligible for tax relief value for each relevant employee.
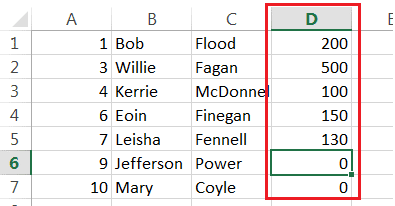
20. For all employees that you don’t pay medical insurance premiums for, remove their values or delete the relevant row.
21. Under column A, check your employees’ numbers are correct. Edit, if required.
Each employee number on the import file must match the exact employee number in Sage Payroll. For example, if the employee is set up in Sage Payroll as number 0054, the import file won’t accept 54 as the employee’s number. For more information about how to create custom number formats in Microsoft Excel, read our guide.
22. Click File, then click Save.
23. Open Sage Payroll and log in to the payroll as normal.
24. Take a back up of your payroll data.
25. From the menu bar at the top of your window, click Miscellaneous, point to Data Import then click Data Import.
26. Browse to C:\BIKMEDTRS.
27. Select BIKMEDTRS.IMP then click Open.
You’ve now successfully imported medical insurance eligible for tax relief values directly into Sage Micropay. To check that these values appear correctly within your employee records, complete steps 28 to 32.
28. Do one of the following:
- From the menu bar at the top of your window, click Processing then click Employee Details.
- From the process map in the centre of Sage Payroll, click Edit Employees.
29. Next to the Surname box, click browse and click the relevant employee.
30. Click the Pay / YTD tab.
31. Under BIK Year To Date, in the Medical Insurance Eligible for Tax Relief box, check the value is correct. If it’s not, you must manually edit the value now and click Save.
32. Repeat steps 29 to 31 for all relevant employees, then click Cancel.
Revenue Information link