CWPS Report Issues after CWPS Update (1st Oct 2019)
Scenario:
After the customer has run their Sage Payroll V22.4 Update and entered their new CWPS ‘Week 1’ payroll (CWPS Week Dated 30/09/2019 – 04/10/2019), they encounter issues with the data that shows in the CWPS Contributions Report.
Symptoms:
The report either shows no data for ‘Pay Week’ 1 (Run Report Week1 – Week1)
Or it shows data at old rates, and for ‘Pay Week’ 39 or 40 (or whichever might be applicable to that payroll) (Run Report Week1 – Week52)
Cause:
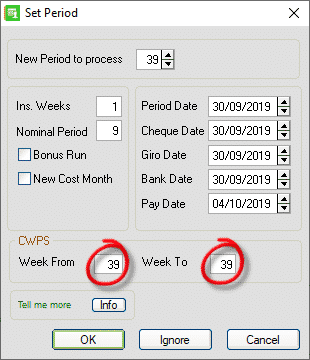
This happens because the new CWPS Calendar was setup after setting the period in question. When you click Set Period – in the background the software grabs the appropriate ‘CWPS’ week number from the CWPS Calendar, based on the ‘Period Date’ field for the period and saves the CWPS data (per timesheet) against the chosen CWPS week number in the CWPS history table. If the new CWPS Calendar is not setup before Set Period, the set period screen will grab the CWPS week number from the ‘Old’ calendar (that being maybe 39 or 40). Some users will notice this in the Set Period screen and will change it themselves. Some wont:
Solution:
As the CWPS week number on the Set Period screen can only be changed at status SOP, the only solution is to:
(Carry out the steps in the order shown below)
- Restore back to the previous period EOP (EG: EOP 38)
- Check the CWPS Rates are still the new ones. (If they are not – run the update again or change them manually).
- Set up the New CWPS Calendar (Start Date 30/09/2019)
- Set the period in question (EG: Period 39) making sure that the CWPS Section of the Set Period Screen says ‘Week From: 1’ and ‘Week To: 1’ (If weekly payroll). This may say ‘Week From: 1’ and ‘Week To: 4’ if it’s a monthly payroll.
- Clear the CWPS Balances: Click Year End at the top of the screen and then click New Construction Pension Year. Click yes to the message when prompted.
- Check CWPS Report (Week 1 – Week 52) to confirm it is blank.
- Run Timesheets again.
- Run EOP.
- Check CWPS Report Again (Week 1 – Week 1) – It should be ok now.
