• New Sage Payroll Update v27.1 Released
    Includes ERR and CWPS enhancements
  • New Sage Payroll Update v27.1 Released

KB Category: Sage 50 Accounts

Sage 50 Accounts

AccountsMate For Sage 50 – Installation Instructions

Prerequisites

To install AccountsMate you will need the following

1. An email from Pimbrook Software with the AccountsMate installation string.

2. If this is the first installation of AccountsMate in the organisation a set up will run to link to Sage 50 and you will need to ensure the following:

  • AccountsMate is run for the first time on a computer that has Sage 50 installed in order to complete its initial setup.
  • You have a Sage 50 login (user & password), it is recommended to use the “manager” login details to give full access.

3. It is recommended that your Sage 50 should be the latest version for the best compatibility, but it must be at least version 24 or higher.


Installing the Software

To install the AccountsMate software application, follow these steps;

1. Click this link to download and run the installer -> AccountsMate Installer

2. Copy and paste the install string from your installation email into the Enter Install String box when prompted,

3. Click Install and confirm the organisation details.

3. The installer will download the application software and prompt for the install folder,

4. Accept the default folder (or change if required) and click Next to confirm the installation.

5. The installer will display a screen to indicate when the installation is complete.

6. Click Close.

7. There should be an AccountsMate Console icon on the desktop, click this to start AccountsMate.


Setting Up the Software (at first run only)

When AccountsMate is run for the first time, it will start a Set Up process to link with Sage 50.

The following steps are involved.

1. AccountsMate requires at least one administrator user to complete its set up. The system will ask if you want to be the administrator.

2. Click Yes to become an administrator.

3. The system will prompt to set up a link to the Sage 50 companies.

4. Click Yes.

5. The system will display the Company Creation screen (see below) and scan for Sage 50 companies.

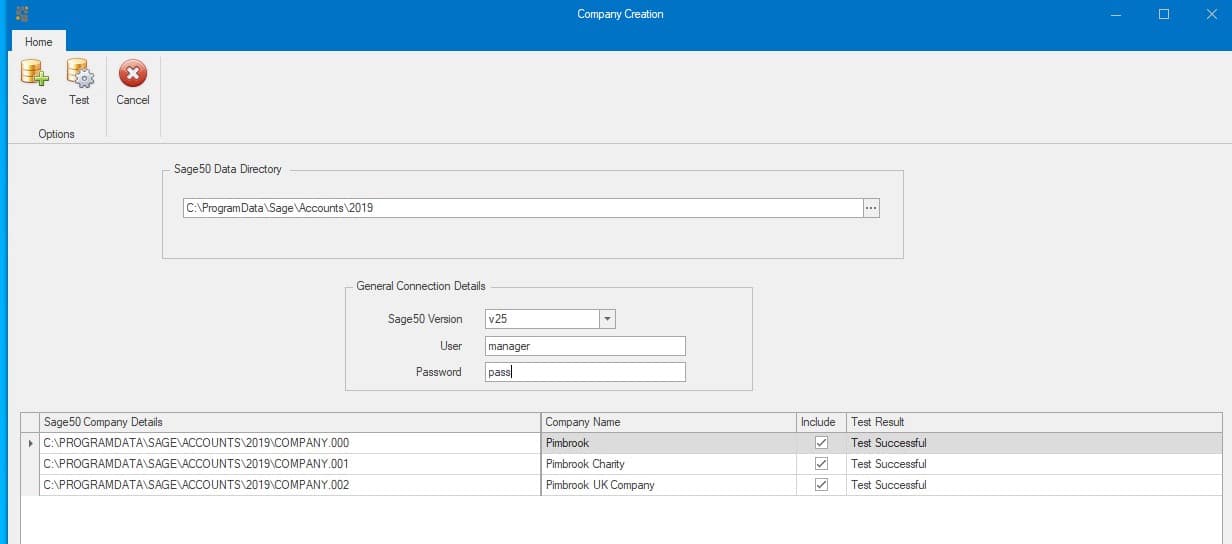
6. When it finds them it will display the available Sage 50 companies.

7. Enter the Sage 50 login User & Password (t is recommend to use the “manager” login for full access).

8. Press the Test button in the top toolbar.

9. AccountsMate will test the connection to each company included and return the Test Result. If unsuccessful, the login details are probably incorrect, try a valid Sage 50 login and test again. When AccountsMate successfully connects to a company it will display the Company Name from Sage 50, as shown in the screen sample below.

10. Ensure the companies required are ticked under the Included column, as shown above.

11. Click Save to save these settings.

12. AccountsMate will restart.

13. See our User Guide here -> AccountsMate for Sage 50 – User Guide for help with using AccountsMate.


Installation Issues

There may be issues with the installation depending on a users system environment and set up.  Below are the common ones we have seen and how to address them.

Problem Finding Sage 50 Companies

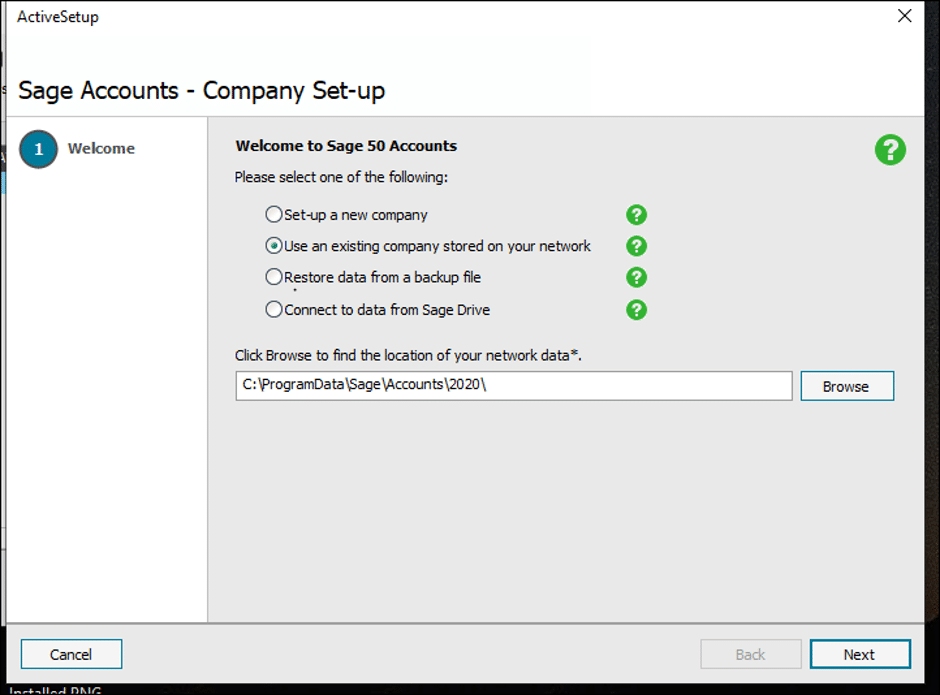
AccountsMate may not be able to find the Sage 50 companies at the Company Creation screen (step 5-6 in the Setting Up section above). If this is the case the user will be allowed to browse the system to find the Company.UNC or Company file on the computer. Please ensure that AccountsMate is being run the first time on a computer that has Sage 50 installed. The user may also need to enter the version number in this case.

Setting Up AccountsMate to Run on a Computer With No Sage 50

AccountsMate can be set up to run on a PC that does not have a Sage 50 client installed. This is useful if you wish to give access to users that do not have full access to Sage 50. The following link gives instructions on this set up

AccountsMate For Sage 50 – Running on a PC without a Sage 50 Client


Changing the Standard VAT Rate In Sage 50

Sage 50 allows you to edit your VAT Rates under Settings>Configuration>Tax Codes. Here you can nominate a new code to be the new Standard Rate.

You will also need to create two further new Tax Codes to represent the existing Tax Codes T8 and T24 which are currently linked to Tax Code T1. You may also need to set up two further Tax Codes to represent T11 and T18.

We recommend using the following codes:

  • T39        replaces T1
  • T40        replaces T8
  • T41        replaces T24
  • T42        replaces T11
  • T43        replaces T18

If these are not available use the next available codes.


Changing VAT Rates in Sage 50

The steps involved to change VAT rates in Sage 50 are as follows:

1. Settings>Configuration>Tax Codes

2. Select Code T39 or the next available

3. Click Edit and amend

Percentage 21%
Include in VAT Return
Resale ticked
Outside EC Unticked
Rate Standard.
Change description to Temp. std rated sales and purchase of goods for resale
Click OK

4. Repeat for T40 or next available

Percentage 0%
Include in VAT Return
Resale ticked
Outside EC Unticked
Enable EC Code EC Purchases, Goods
Link to T39 (or alternative)
Rate Standard
Change description to Temp. std rated purchase of goods from suppliers in EC
Click OK

5. Repeat for T41 or next available

Percentage 0%
Include in VAT Return
Resale unticked
EEC Unticked
Enable EC Code EC Purchases, Services
Link to T39
Rate Standard
Change description to Temp. sd. Rated purchases of services from suppliers in EC
Click OK

6. Repeat for T42 or next available

Percentage 21
Include in VAT Return
Resale Unticked
Outside EC Unticked
Enable EC Code Unticked
Rate Standard
Change description to Temp. sd. Rated purchases of goods for non-resale
Click OK

7. Repeat for T43 or next available

Percentage 0%
Include in VAT Return
Resale Unticked
Outside EC Unticked
Enable EC Code EC Purchases, Goods
Linked to T42 (or alternative)
Rate Standard
Change description to Temp. sd. Rated purchases of goods for Suppliers in EC
Click OK

8. Click OK then Apply

9. Click Close, then if prompted to save changes click NO


Areas To Consider When Changing VAT Rates 


1. Recurring Entries – Sales, Purchase Orders, Invoices and Credits:
  • Ensure you have processed all entries prior to the VAT rate change.
  • Click the relevant list i.e. Invoices, Sales Order or Purchase Order
  • Click New or New Invoice and Recall and then Load.
  • Change the VAT Code, Click OK
  • Memorise again with a different name
    .
2. Recurring Entries – Batch Invoices and Credits:
  • Ensure you have processed all entries prior to the VAT rate change.
  • Click Batch Invoice & Recall the batch.
  • Change the TAX Code.
  • Memorise again with a different name.


3. Recurring Entries Bank Transactions:
  • Ensure you have processed all entries prior to the VAT rate change.
  • Click Bank Payments & Receipt’s & Recall.
  • Change VAT Code and click OK.


4. Outstanding Orders & Invoices:

All outstanding invoices and orders may need a VAT code change if not completed before the VAT rate change.


5. Customer, Supplier & Product Records:

You have a default VAT code on each master record that may need changing. If you only have a small number you can edit each record, otherwise select a number of records that require changing and use Batch Change. You can use the “Filter” feature on these list screens to filter where the “Default Tax Code” = the tax code you wish to change (i.e. T1). Then select all the filtered records and use the “Batch Change” to change the “Default Tax Code” to the new code required (e.g. T39).


6. Special Product Codes (S1 and S3):

If you use the Special Product Codes S1 or S3 you can amend the default tax code for these by going to Settings, Invoice and Order Defaults, Options and change the Default tax codes in the Specials Items section at the bottom and select OK.


7. Other Considerations:
  • 3rd Party software importing records into Sage 50 – need to ensure you are in sync with codes..
  • Any bespoke VAT reports may need to be reviewed.
  • EU related codes for notional VAT.
  • Be mindful of unallocated items when you have two different VAT codes on the account.
  • Sage 50 Irish Vat codes –> see Sage 50 Irish VAT Codes


Demonstration Video:

See our demonstration video here –>  Sage 50 Vat Change Demonstration


AccountsMate For Sage 50 – Overview

AccountsMate for Sage 50 is an enhanced query tool supplied by Pimbrook Software to allow clients to open up their Sage 50 data by:

  1. Giving current users better ways to enquire on the Sage 50 information.
  2. Allowing staff that currently do not have Sage 50 access to view key information (e.g. customer service can view account information, sales reps can see product and prices or warehouse staff can lookup stock details).
  3. Exposing Sage 50 information to remote staff.

It is easily installed and set up with no extra Sage 50 licences needed or no need to have Sage 50 installed on the PC.

See the links below for more information on AccountsMate:


Sage 50 Accounts V26 – Features & Downloads (Includes V26 Updates)

We’re happy to announce that Sage 50 Accounts v26 and Sage 50cloud Accounts v26 are now available.
You can check your current software version by clicking Help and About in your software.

New Features:
What’s New in Sage50 Accounts v26? – Click Here

Downloads:
To Download Sage 50 v26 Full Install – Click Here (406mb)
To Download Sage 50 v26.1 Update – Click Here (406mb)
To Download Sage 50 v26.2 Update – Click Here (69mb)

Moving Sage 50 To a New Computer

Moving Sage 50 from an old computer to a new computer involves an number of steps to install the software on the new machine and to connect it to the existing company dataset(s).

The procedure is outlined below:

1. Get access to all the Sage 50 company data on the old computer.

(a) You can find out where the data for each company is held from the old computer by looking at the “Data path” on the “Select Company” screen which loads when you start Sage 50  (if this does not load select “File – Open Company Data” ).

(b) If any of the company data paths are local on the old computer then take a company backup of these and copy this backup to the new computer (ensure that this backup includes all file types so that any customised reports, layouts and attachments, etc. will be saved) . See our article on Backing up Sage 50 if you need help with this.

(c) If a company data is on another computer on the network you should take note of the data path so that you can connect to this later from the new computer.

2. Perform a Sage 50 install on the new computer, the steps for this are described in our knowledge base article Installing Sage 50.

3. Open Sage 50 on the new computer the “Company Set-up” screen should open to allow you to set up a new company (if this does not you can get to it by selecting “File – Open Company Data – Add Company”).

  • If the company you are adding has its data on a server or other computer on the network then select “Use an existing company stored on your network” and enter/browse to the location of the data noted in 1c above (e.g. \\ServerName\Sage\Accounts\2020\Company.000). It is not recommend to use mapped drives, instead use the full server name as in the example.
  • If the company you are adding was held locally on the old computer and will be held locally on this new computer then you will need to restore it from a previously taken backup (see 1b above). To do this Select “Restore data from a backup file” and enter/browse to the location of the backup file that you copied from the old computer.

Click “Next” to connect or restore to your data, you will be asked to enter your login details to access this company data.


Installing (or updating) Sage 50

This article provides a link to our Sage 50 Installation Guide which outlines the steps required to install or update the Sage 50 software.

Before beginning the install there are a number of preparation steps that should be completed, our Sage 50 Checklist can help you ensure these are done in advance.

Important Recommendations

  • Use a system login with full system administrator rights (to allow installing software etc.).
  • Disable anti-virus / firewalls / window defender, while downloading the software.
  • Check and ensure all your company data sets have no errors or warnings.
  • Take a full “All Files” backup of all your Sage 50 company data sets.
  • If upgrading an existing Sage 50 system that is more than 1 version old, we recommend that you upgrade the data through each major version release (e.g. if going from version 24.2 to version 27, you should upgrade the data to v25, then v26 and finally v27). This is to reduce the risk of data corruption.
  • If you have upgraded to version 27 or above for the first time, when you first log into each company for the first time you will be prompted to load in new tax codes (for Brexit). Please ensure your computers regional settings are correct for each company (i.e. UK or Ireland) before opening the company.
  • Note any discrepancies listed on the conversion logs as users may need to take action.
  • Turn off automatic updates within your sage for each user
    – Help > software update settings > select manual > I’ll check for updates

When you are ready to perform the installation, click the following link to open our Sage 50 Installation Guide


Sage Drive Issue – ‘Your computer is not connected to the Internet’

Sage Drive requires a broadband Internet connection with a download speed of at least 4Mbps, and an upload speed of at least 2Mbps. You can check your connection speed at various sites online, such as www.speedtest.net

When opening or working in a company that’s shared using Sage Drive, the following message may appear:

”No Internet connection”
”your computer is not connected to the Internet”

To check to see if the connection has been restored, and to submit your changes, click Retry.
If the connection cannot be restored, and you need to continue processing data, click Work offline.

WARNING: If you choose to work offline, you must advise anyone connected to your data using Sage Drive to stop processing, otherwise they will lose their work when you go back online.
To discard your changes and close Sage Accounts, click Close.’

This message appears on the Sage Drive main site if the connection to the Sage Drive service is lost, for example, if the main site has Internet issues, or if you need to update to a Sage Drive compatible version of your software.

Using Sage 50 Accounts v23.2 or above

If you receive this message, you have the option to Retry, Work offline or Close.

Retry

If you choose to Retry:

  • If it reconnects successfully – the entry you’re posting posts successfully and it’s OK to continue posting at all sites.
  • If the reconnection fails – the same No Internet Connection message appears again.


Work offline

If you choose to Work offline, all remote sites should stop posting until the main site reconnects.

Warning

Pimbrook software strongly recommend not selecting to working offline. Any time it’s offline we suggest that everyone should stop working as this may result to loss of data.


If users continue to work in this company at the remote sites, any postings they make from this point will be lost when the main site reconnects.

When the main site reconnects to Sage Drive, users working at remote sites see the following message:

‘Sage Drive
The main site has reconnected to this Sage Drive Company.
Any changes you make now will not be overwritten by the main site.
To continue, click OK.’

Once this message appears, they must check and if necessary re-enter any postings they’ve lost.


Summary

  1. Keep clicking on the Retry button until it connects
  2. If you choose to work offline ; all the remote sites should stop posting until the main site reconnects

Sage Drive Issue – Prompt for Sage ID when opening Sage 50 Accounts

When you open Sage Accounts, you may be prompted for your Sage ID sign in details that were used when setting up Sage Drive.

Why do I get this prompt?

‘For security reasons you must occasionally re-enter the Sage ID login details for Sage Drive’ when opening Sage 50 Accounts

When you open a Sage Drive company and enter your Sage ID login details, a token is created on your computer that lasts for 6 months. This means you shouldn’t have to enter your login details again within this period, unless something changes on your computer.

Previously, when using Sage Accounts, on the day your token expired, you had to enter your Sage ID login details to access your software.

In Sage Accounts 25.1 and above, from 30 days before the token expires, a warning message appears letting you know that your token will expire with the option to enter it immediately, or to be reminded later.

30 days – 1 day warning message

Sage ID expiry

for security reasons you must occasionally re-enter the Sage ID login details for Sage Drive.

The current details for user “***user email address***” will expire in xx days. To continue to access this company, please re-enter the Sage ID and password.

If you’re ready to log in, click Log in now. If not, click Remind me and select a time that suits you then click Log in later.

If you know your Sage ID login details, click Log in now and enter the details and click Sign In.

If you don’t have the Sage ID login details, click the Remind me drop-down and click the time when you want to be reminded, then click Log in later. Your software will then open as usual.

24 hour warning message

When you’re within 24 hours before the token expires, the following message appears:

Sage ID expiry

for security reasons you must occasionally re-enter the Sage ID login details for Sage Drive.

The current details for user “***user email address***” will expire in 24 hours. To continue to access this company, please re-enter the Sage ID and password.

If you know your Sage ID login details, click Log in now and enter the details and click Sign In.

You can still click Close and access you software at this stage, but once past the 24 hour period, you must enter your Sage ID login details to gain access. 

Ensure you enter your correct details

If you’re still prompted to login, please enter the Sage ID email address and password.

At the main site This is the email and password you used when uploading your data to Sage Drive.
At a remote site Please enter the Sage ID email address and password for the user at the remote site. If different to the main site


Summary:

The correct Sage ID and password must be entered to open Sage