Installing Sage Payroll (Micropay)
To install Sage Payroll (Micropay) follow these steps.
1. Ensure you have the following set up on the new computer to allow a successful installation of the payroll software, you may need to consult with your IT service provider to get these set up.
a. The Windows operating system has the latest updates installed.
b. The Windows login you are using has full administrator rights for that computer.
c. Any anti-virus and the “User Access Control” is turned off while installing so that they do not block the installation.
2. Run the installation program for the version of the software required (note: these can be found on the Pimbrook website download area). The program will bring you through the installation steps, continue through these taking the following options where appropriate depending on the installation set up required.
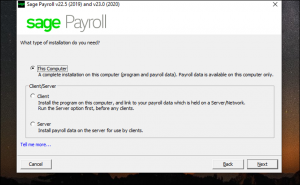
3. Choose the installation type required, either “This Computer” for a standalone installation on the current computer only or “Client/Server” for a networked installation across multiple computers. If the “Client/Server” is required, install the “Server” first and then install the “Client” by running the install program again.
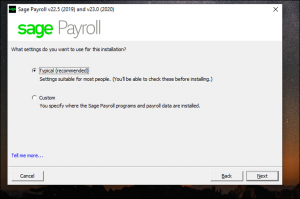
4. Select the installation settings when the screen below is shown,
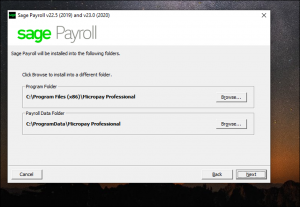
5. Click “Typical” to install the software into the default directory paths or click “Custom” to display and change these directory paths.
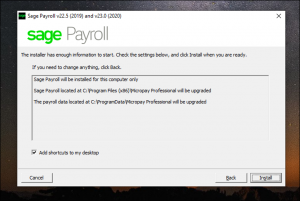
6. The confirmation screen will be displayed showing the directory paths and other settings that will be used for the installation.
7. Click “Install” to perform the installation. (If you wish to change any of the settings click “Back”.).
8. If you are performing a “Client/Server” installation and you have completed the “Server” install, you will need to run the installation program again and follow the above steps but select “Client” at step 3 this time, otherwise you have completed the installation.


