• Transition from TASBooks to Sage 50
    Easy with the Right Partner and Remarkably Beneficial
  • Transition from TASBooks to Sage 50

KB Category: Sage Payroll (Micropay)

Install error: ‘Unsupported Windows version – This version of Windows is not support. Windows 7 or later is required.’

Install error: ‘Unsupported Windows version – This version of Windows is not support. Windows 7 or later is required.’


When you try to install the latest update of Sage Payroll the following message appears:

‘Unsupported Windows version – This version of Windows is not support. Windows 7 or later is required.’


You’re then unable to run the update. To close the message, click OK.


This issue can occur if you run, or have previously ran your computer on a compatibility mode other than your current version of Windows. For example, XP compatibility mode.

Even though your operating system is different, the Windows registry holds the compatibility mode settings in the background. When you try to install the Sage update, your computer checks the Windows registry, finds the compatibility mode settings and stops the installation from proceeding any further.

To quickly check your current version of Windows:

  1. Press the Windows key  + R.
  2. Type Winver and click OK.


To resolve this, you must complete one or both of the following options:


To fix this issue


Please check if any Windows updates are available and ensure that all updates have been successfully installed. If you need help with this, please contact your local IT support.

If you haven’t installed Windows updates in some time, you may be required to do several sets of updates. Continue to check for updates until your computer advises that there are no further updates available. You will need to restart your computer after each set of Windows updates to ensure that they are fully applied.

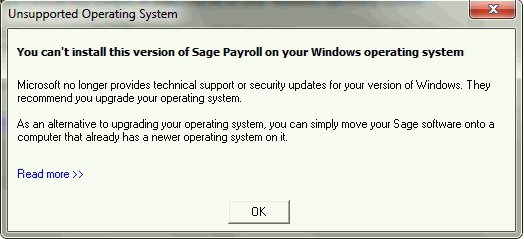
Please check that the computer you’re trying to install Sage Payroll on is listed as supported in our recommended system requirements article. If it’s not listed, you must either upgrade the operating system (OS) on your existing computer, or move your Sage software to a computer that already has a newer version of Windows installed on it. For example, Windows 10.

For help with moving your Sage software to a new computer, please click on the relevant option below:


Disable the compatibility mode option


  1. Close Sage Micropay or Quickpay and any other software you have open.
  2. On the Windows desktop, right-click the Micropay or Quickpay icon then left-click Properties.
  3. Click the Compatibility tab.
  4. Under Compatibility mode, clear the Run this program in Compatibility mode for check box.
  5. Under Privilage Level, select the Run this program as an adminstrator check box.
  6. Click Apply and OK.
  7. Open Micropay or Quickpay and log in to a payroll as normal.
  8. On the menu bar, click Help then Check For Updates.
  9. When prompted, download and install the update.

If the issue still occurs, you must close Sage payroll and complete the steps detailed in the following section.


Amend the Microsoft Windows registry manually


Note: Using the Microsoft Windows Registry Editor incorrectly can cause serious, system-wide problems that may require a reinstall of the Microsoft Windows operating system to correct them. Sage can’t guarantee that any problems resulting from the use of Registry Editor can be solved. If in any doubt, please refer to your IT Administrator.

  1. Press the Windows key + R.
  2. Type regedit and click OK.
  3. Browse to HKEY_LOCAL_MACHINE/SOFTWARE/Microsoft/Windows NT/CurrentVersion/AppCompatFlags/Layers.
  4. Locate and right-click a Micropay or Quickpay entry, then click Delete.
  5. When prompted if you want to permanently delete this value, to continue, click Yes.
  6. Repeat steps 4 and 5 until all Micropay or Quickpay entries are removed.
  7. Browse to HKEY_CURRENT_USER/Software/Microsoft/Windows NT/ CurrentVersion/AppCompatFlags/Layers.
  8. Locate and right-click a Micropay or Quickpay entry, then click Delete.
  9. When prompted if you want to permanently delete this value, to continue, click Yes.
  10. Repeat steps 8 and 9 until all Micropay or Quickpay entries are removed.
  11. To close the Registry Editor window, click File and Exit.
  12. Open Sage Micropay or Quickpay and log in to a payroll as normal.
  13. On the menu bar, click Help then Check For Updates.
  14. When prompted, download and install the update.


View Payroll Submission Log


View Payroll Submission Log


If you want to check or review the previous submissions you’ve made to Revenue, you can do this using the View Payroll Submission Log option in Sage Payroll 2019.

The log shows you summaries of successful, pending or failed submissions, which you can filter by period date. You can also export a detailed report of each submission contained in the log for more information about what was submitted. This can be very useful if the Revenue query a submission you’ve made.

1. From the menu bar at the top of your Sage Payroll window, click Direct Payroll Reporting then point to Payroll Submission then click View Payroll Submission Log.

The View Payroll Submission Log window displaying the following information about the submissions you’ve made. You can sort the information by clicking on any of the column headings.

Date of Submission The date and time of the submission.
Pay Period The relevant period the submission relates to.
Submission ID This is Revenue’s unique identifier for the submission.
Pay Run Reference This is Sage Payroll’s unique identifier for the submission.
Status The current status of the submission. For example, if the submission was successful sent to Revenue, it’s status shows as Completed.


2. In the From and To boxes, enter the relevant period date range.

By default, all payroll submissions created in this tax year appear.

3. To view further details of a submission, click Export Details next to the relevant submission entry.

To print the report, click the Printer button.
To save a PDF copy of the report, click the Save button.
To close the report, click X at the top right-hand side of the window.

4. To close the View Payroll Submission Log, click Close.

Employee payment dates on the Payroll Submission Request (PSR) to Revenue

Employee payment dates on the Payroll Submission Request (PSR) to Revenue


From 1 January 2019, employers must send a payroll submission to Revenue each time their employees are paid. You can quickly and easily do this in Sage Payroll 2019 by using the Send Payroll Submission option.

Each of your employees will have their own payment date specified on a payroll submission and this payment date is based on the pay method of the employee and the dates set up in your payroll calendar. For employees paid by:

  • Bank transfer – The payment date is the EMT Date of the relevant period. The EMT date on the payroll calendar must be set to the exact date the employee is receiving the funds into their bank account.
  • Cash – The payment date is the Pay Date of the relevant period.
  • Cheque – The payment date is the Cheque Date of the relevant period.
  • Giro – The payment date is the Giro Date of the relevant period.


To check or edit your payroll calendar dates


  1. From the menu bar at the top of the window, click Company/Payroll then click Calendar.
  2. Review the information held within the Calendar Details tab, then do one of the following:
  •  To re-create the calendar, click the New Calendar tab, enter the relevant details then click Update. Review the information held within the Calendar Details tab again then click Save.
  • To manually edit dates, click into the relevant date field that you want to change then type in the new date. Repeat this process until you’re happy with the details entered, then click Save. If you don’t want to edit the dates, click Cancel.

Click here For detailed instruction on how to set up a calendar


Moving an Employee From one payroll to another (2018 and below)

Moving an Employee From one payroll to another


You must manually transfer the employee’s year to date values from their current company into the second company. We recommend that you print the employee’s Earnings Tax & PRSI report. This report details their personnel details and year to date values for the current company.

1. Open Sage Payroll and log in to the payroll you want to move the employee from.

2. Do one of the following:

  • From the menu bar at the top of your window, Reports then click Payroll Reports.
  • From the process map in the centre of Sage Payroll, click Other Reports.

3. Click the Employee tab, then select Earnings Tax & PRSI.

4. Under Selection, in the Sequence list, select Employee Code. Then enter the employee’s number in the From and To boxes.

If you’re unsure of what the employee’s number is, you should check the employee’s record.

5. Click Print, then click Cancel.

6. From the menu bar at the top of thew window, click Login then click Login to a Payroll.

7. Log in to the company payroll that you want to move the employee to.

8. Do one of the following:

  • From the menu bar at the top of your window, click Processing then click Employee Details.
  • From the process map in the centre of Sage Payroll, click Edit Employees.

9. Set up the employee, then enter their year to date values, using the printed Earnings Tax & PRSI report as a point of reference.

10. Finally log back into the payroll you moved the employee from, and delete the employee’s record


Error code AUSE099 – An unknown error has occurred…

Error code AUSE099 – An unknown error has occurred…


When downloading or installing an automatic update you may receive the following error message:

Error Code = AUSE099 

Detailed Error Description = An unknown error has occurred. Please contact Sage Customer Services.

This is due to a application issue.


Using a proxy server?

If you’re using a proxy server, confirm that your proxy settings are in place.


Check access to the Sage Update Service

Use Telnet to test if you have access to the Sage Update and Download sites, using the following settings:

Web address Port number
update.sage.com 443
download.sage.com 443

If you can’t access the sites, this must be resolved by your local IT support.

If you can access the sites successfully, download and install the required update from the Updates page.


Error code AUSE005 – Your computer’s disk is almost full…

When downloading or installing an automatic update you may receive the following error message:

Error Code = AUSE005

Detailed Error Description = Your computer’s disk is almost full. Please check that you have at least xxxx of free disk space available on your computer’s disk.

This is due to a insufficient hard disk space.

You must free up disk space then check for updates again, using the Help > Check For Updates option within your Sage software.

For information about the recommended system requirements, please contact the office.

Error code AUSE004 – The download failed. Please contact Sage Customer Services.

Error code AUSE004 – The download failed. Please contact Sage Customer Services.


When downloading or installing an automatic update you may receive the following error message:

Error Code = AUSE004 

Detailed Error Description = The download failed. Please contact Sage Customer Services.


The download completed but verification failed, the update may have been damaged, or is not genuine

Download and install the required update from the Updates page.


Error code AUSE003 – The download failed. Please check your Internet connection…

Error code AUSE003 – The download failed. Please check your Internet connection…


When downloading or installing an automatic update you may receive the following error message:

Error Code = AUSE003

Detailed Error Description = The download failed. Please check your Internet connection or contact your system administrator.

This is due to a failure to establish a connection to the checking service host, or the update could not be found.


Check your internet connection

Check if you can view web pages, for example www.google.com If you can’t, please contact your local IT support.


Check the Auto Update Service is available

Visit trust.sage.com, If there are issues with the service, please wait until these are resolved then retry the update.


Using a proxy server?

If you’re using a proxy server, confirm that your proxy settings are in place.